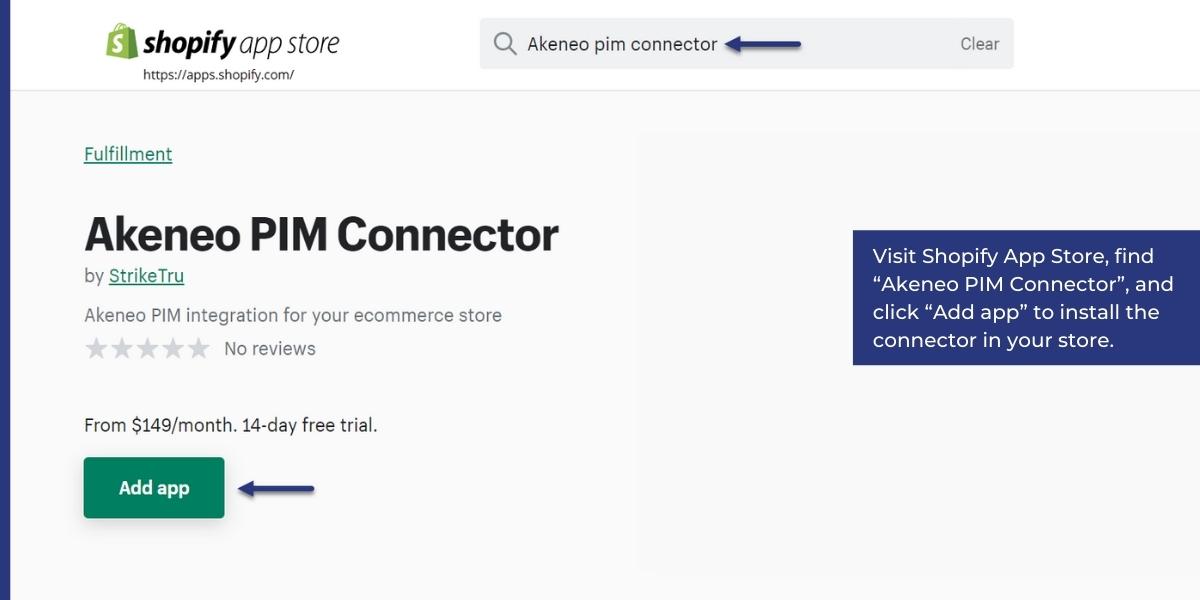
- Visit Shopify App Store, find “Akeneo PIM Connector”, and click “Add app” to install the connector in your store.

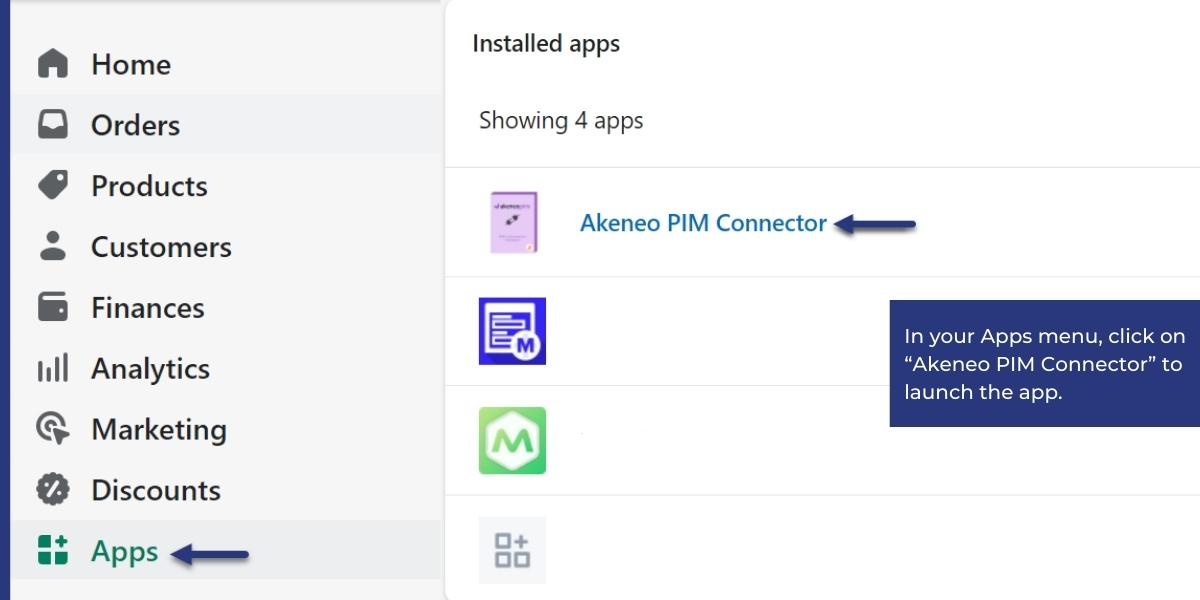
- In your Apps menu, click on “Akeneo PIM Connector” to launch the app.
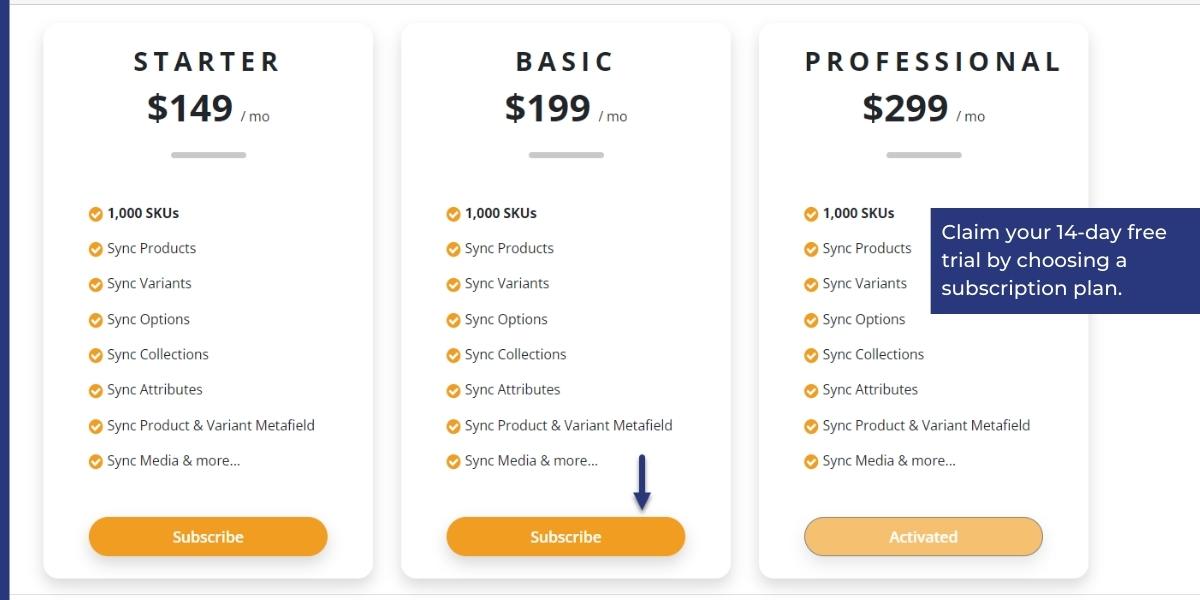
- Claim your 14-day free trial by choosing a subscription plan.
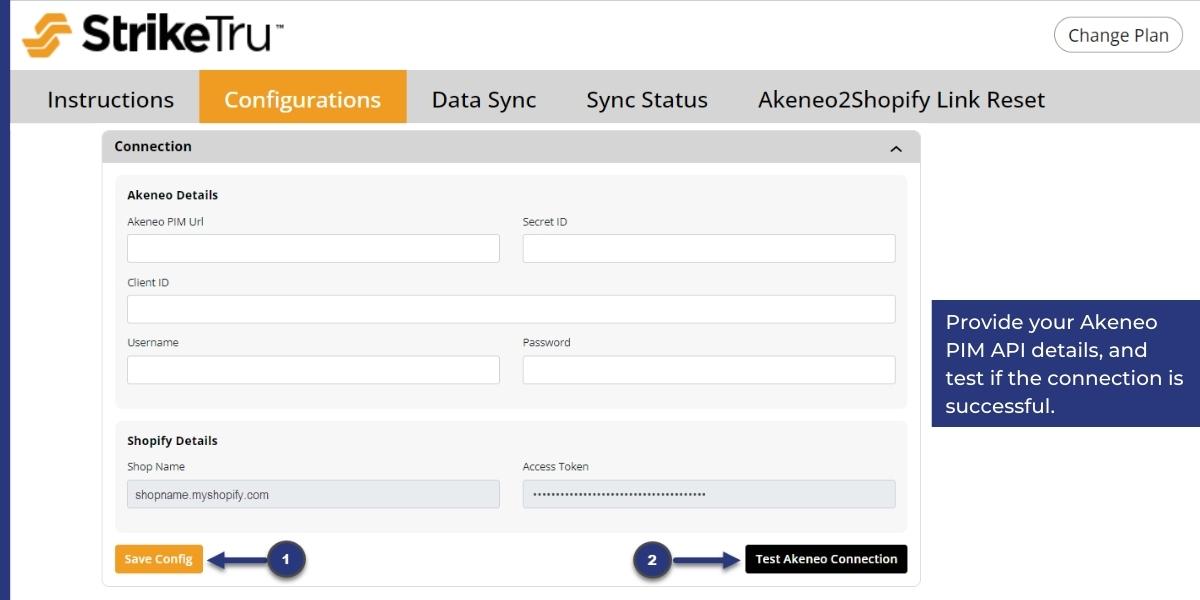
- Provide your Akeneo PIM API details, and test if the connection is successful. Don’t forget to save your connections.
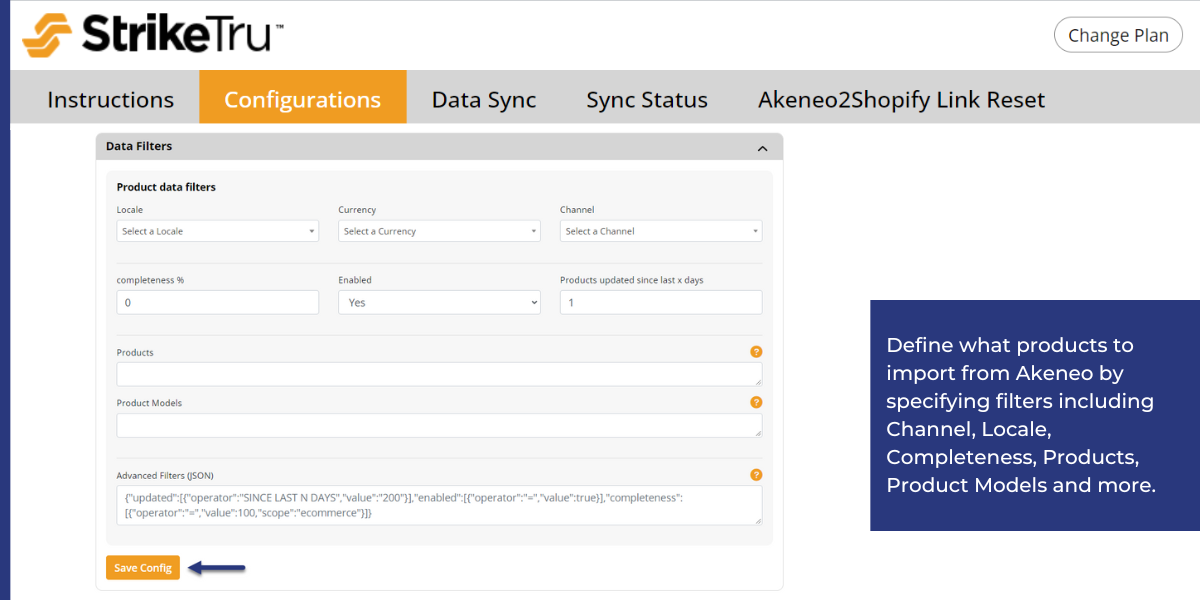
- Define what products to import from Akeneo by specifying filters including Channel, Locale, Completeness, Products, Product Models, and more. Don’t forget to save your filters.
NOTE: When using Products and Product Models filters, only the “Advance Search (JSON)” filter will get overridden and the rest of the filters will work as expected in the app. If you would like to use the Products and Product Models filters please keep the “Advance Search (JSON)” filter as empty and vice-versa.
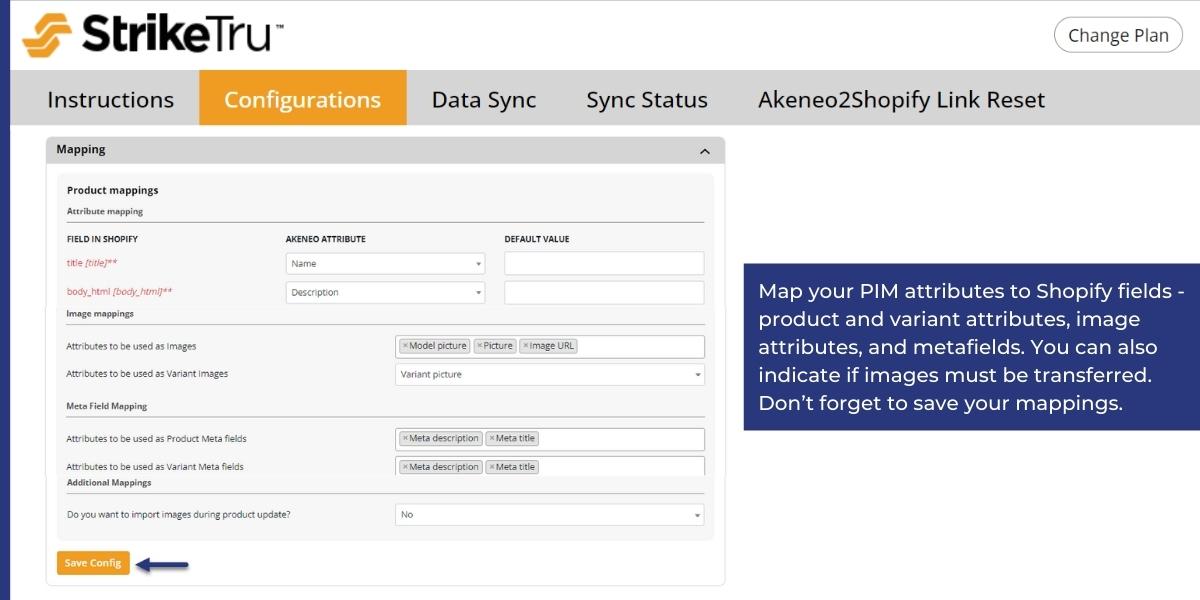
- Map your PIM attributes to Shopify fields – product and variant attributes, image attributes, and meta fields. You can also indicate if images must be transferred. Don’t forget to save your mappings.
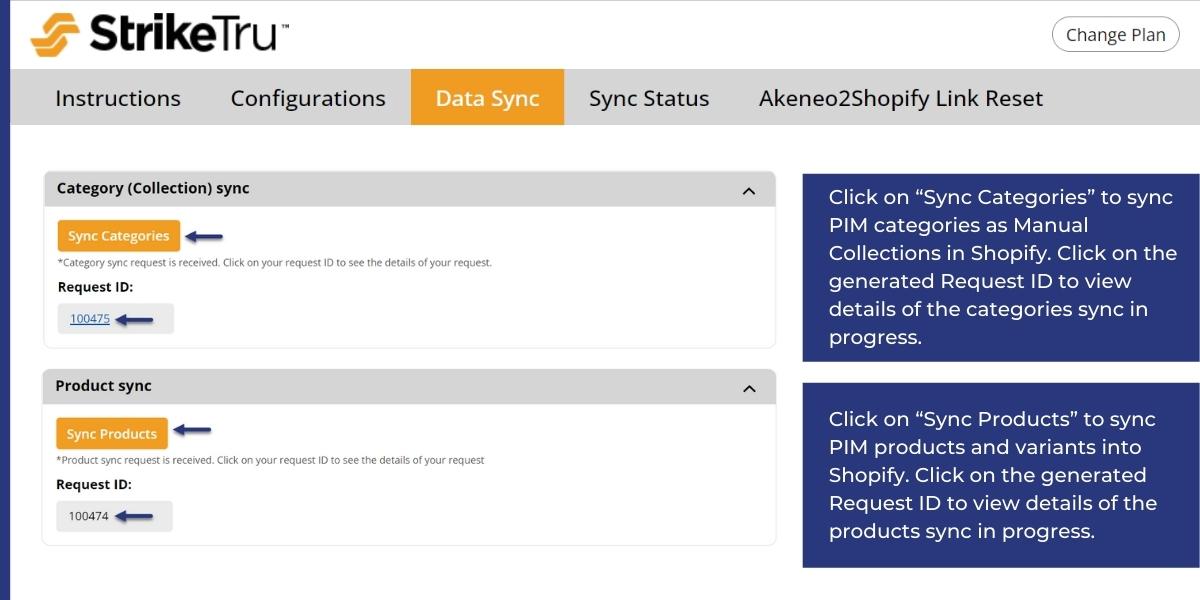
- Click on “Sync Categories” to sync PIM categories as Manual Collections in Shopify and click on the generated Request ID to view details of the categories sync in progress.
- Click on “Sync Products” to sync PIM products and variants into Shopify. Click on the generated Request ID to view details of the products sync in progress.
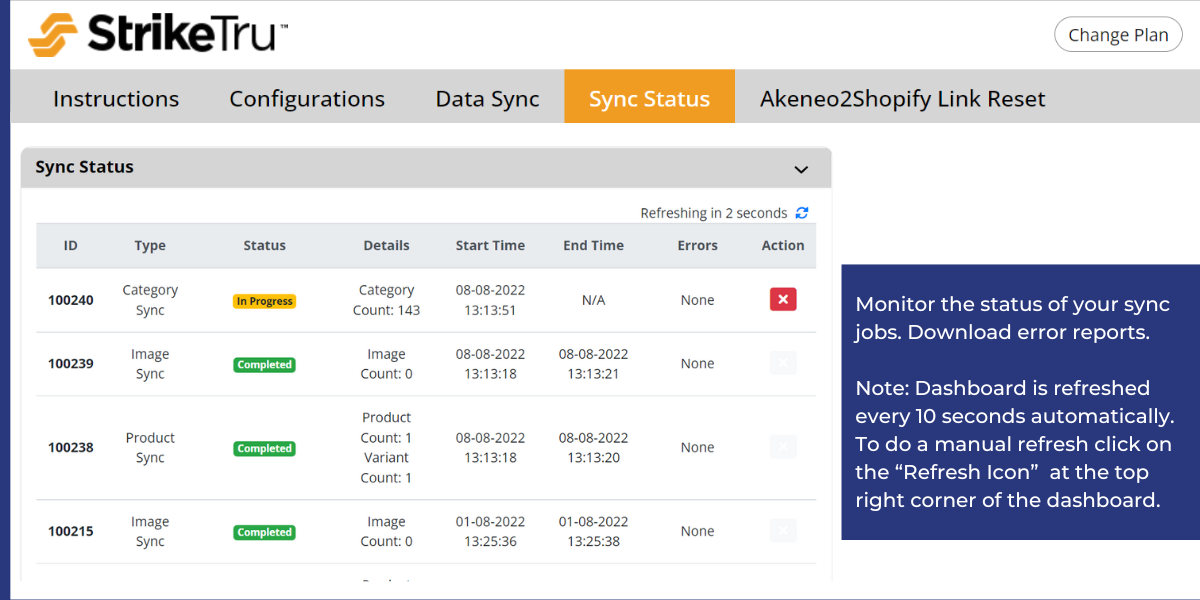
- Monitor the status of your sync jobs. Download error reports.
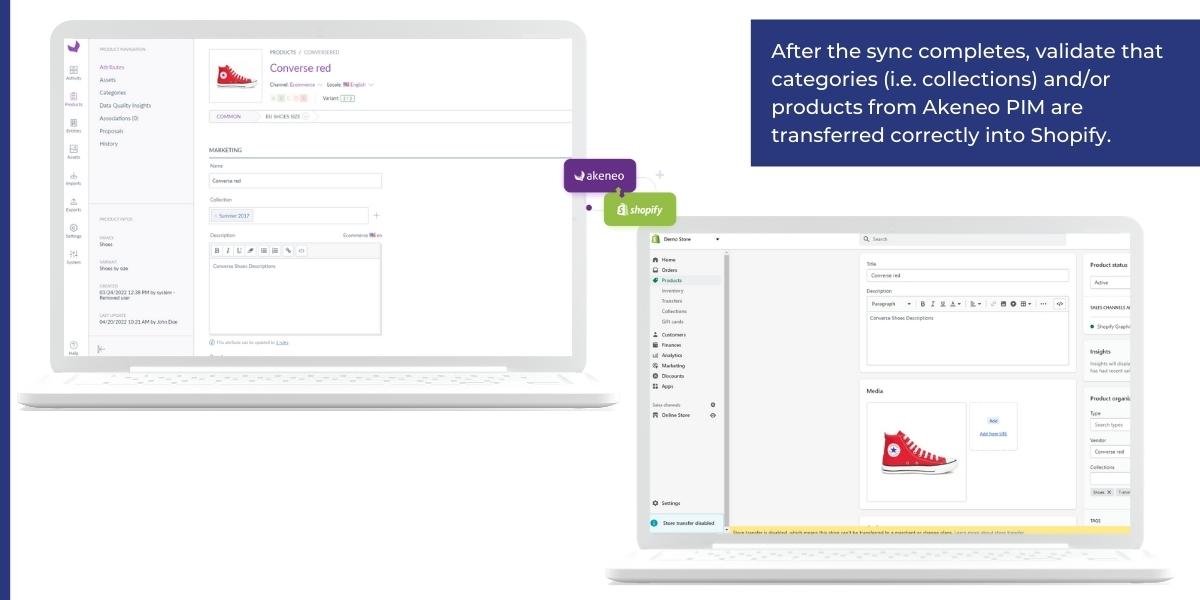
- After the sync completes, validate that categories (i.e. collections) and/or products from Akeneo PIM are transferred correctly into Shopify.
Instructions
1. Configurations Tab
- Log into Akeneo PIM. Create a new Akeneo API connection or identify an existing one for use by the connector.
- Go to the Connector app. In the “Connection” section, provide Akeneo API credentials. Click “Save Config”.
- Click “Test Akeneo Connection” button to verify if the API connection is established successfully.
- In the “Data Filters” section, define what products to import from Akeneo PIM by specifying filters including Channel, Locale, Completeness, and more. Click “Save Config”.
- In the “Mapping” section, map which PIM attributes should be transferred to which Shopify fields (product and variant attributes, image attributes, and metafields).
- In the “Additional Mapping” section, indicate if images must be transferred to Shopify. Click “Save Config”.
- Proceed to the “Data Sync” tab.
2. Data Sync Tab
- To transfer PIM categories to Shopify, open “Category (Collection) Sync” section and click on “Sync Categories”. A Request ID will be generated and displayed.
- Click on the generated Request ID to view details of the category sync in progress.
- You can monitor details including record type, sync status, sync counts, and errors. You can also download error logs or cancel the sync job in progress.
- After the sync completes, you can verify that the Akeneo categories are transferred as Collections in Shopify.
- To transfer PIM products to Shopify, open “Product Sync” section and click on “Sync Products”. A Request ID will be generated and displayed.
- Click on the generated Request ID to view details of the product sync in progress.
- You can monitor details including record type, sync status, sync counts, and errors. You can also download error logs or cancel the sync job in progress.
- After the sync completes, you can verify that the Akeneo products, variants, and associated media are transferred into Shopify correctly.
3. Sync Status Tab
- Monitor the status of your sync jobs.
- Note: Status is refreshed on the screen every 10 seconds.
- Click on “Download Report” to review any available error reports.
- Click on the “X” red button to abort the associated sync job.
4. Akeneo2Shopify Link Reset Tab
Deleting A Shopify Collection
- If you must delete a collection in Shopify, follow this process so you can successfully re-sync that category from PIM into Shopify.
- Go to the “Category Reset” section. Enter the ID of the Shopify Collection you want to delete. You may enter multiple Collection IDs as a comma-separated list of IDs.
- Click Reset Category Link. This will delete the specified categories in Shopify and also the associated connector link entries. Now you may successfully re-sync that category from PIM into Shopify again without errors.
Deleting A Shopify Product
- If you must delete a product in Shopify, follow this process so you can successfully re-sync that product from PIM into Shopify.
- Go to the “Product Reset” section. Enter the ID of the Shopify Product you want to delete. You may enter multiple Product IDs as a comma separated list of IDs.
- Click Reset Product Link. This will delete the specified products (and its variants and media) in Shopify and also the associated connector link entries. Now you may successfully re-sync that product from PIM into Shopify again.
Discover More!
Akeneo PIM Connector for Shopify – FAQs
Our extensive list of FAQs will guide you through any questions about the functionality and features of StrikeTru’s Akeneo PIM Connector for Shopify.
Learn More
Akeneo PIM Connector for Shopify Overview
StrikeTru’s powerful integration of Akeneo PIM & Shopify APIs is simple, reliable, and secure. Use our connector and make it to market faster.
Learn More
Akeneo PIM Connector for Shopify – Pricing Packages
The full-feature Akeneo Shopify connector is designed for growing businesses. Choose a plan based on your requirements.
Learn More